
Creating clear film screen print transfers involves the use of a transparent or translucent film to transfer an image or design onto various surfaces through screen printing. This process is commonly used for custom printing on textiles, glass, plastic, and more. Here’s how to make clear film screen print transfers:
Materials You’ll Need:
- Transparent or translucent film sheets (acetate or polyester sheets are suitable)
- Computer and graphics software for designing your artwork
- Screen printing frame
- Screen printing emulsion
- Screen printing ink (suitable for your chosen surface)
- Screen printing squeegee
- Exposure unit or strong light source (e.g., UV light)
- Screen printing press (optional)
- Cleaning supplies (e.g., water, screen cleaner, screen degreaser)
- A well-ventilated workspace
- Safety gear (gloves, apron, safety glasses)
Instructions:
1. Design Your Artwork:
- Create or prepare your artwork using computer graphics software. Make sure it’s the correct size and resolution for your intended print.
2. Prepare the Screen:
- Coat a screen printing frame with emulsion following the manufacturer’s instructions. The emulsion-coated screen will serve as your stencil. Allow it to dry in a dark room until it’s completely dry and hardened.
3. Expose the Screen:
- Place the film sheet with your artwork on top of the emulsion-coated screen. Ensure the film is in contact with the emulsion, and there are no gaps or bubbles.
- Expose the screen to a UV light source or an exposure unit for the appropriate amount of time. This will harden the emulsion in areas not covered by the dark areas of your artwork, creating your stencil.
- Remove the film sheet and rinse the screen with water to wash away the unhardened emulsion, revealing your stencil.
4. Set Up Your Workspace:
- Prepare your workspace by setting up your screen printing press (if you have one) or a flat surface to place your fabric or substrate.
5. Position the Film Transfer:
- Lay your transparent or translucent film sheet with the printed artwork face down onto the substrate (e.g., T-shirt, glass, plastic). Ensure it’s aligned correctly.
6. Apply Ink:
- Load your screen printing ink onto the screen above the film transfer.
- Use a screen printing squeegee to pull the ink across the screen, forcing it through the open areas of the stencil created by the hardened emulsion. The ink will transfer onto your substrate.
7. Dry and Cure:
- Allow the printed design to air dry or use a heat source to cure the ink, depending on the specific ink and substrate you’re using. Follow the ink manufacturer’s instructions for curing.
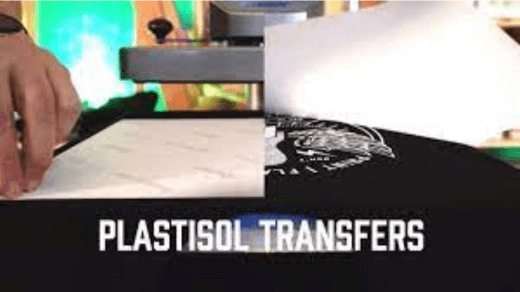
8. Remove the Film:
- Carefully peel off the transparent or translucent film from the substrate. Your clear film screen print transfer should leave the inked design on the substrate.
9. Clean the Screen:
- Clean the screen immediately after printing to remove any excess ink. Use screen cleaner and degreaser as needed.
10. Repeat as Needed:
rustCopy code
– Repeat the process for additional prints as required.
Clear film screen print transfers are versatile and can be used on various surfaces. Be sure to choose the right type of ink for the substrate you are printing on, and follow the manufacturer’s instructions for the specific products you use to achieve the best results.